Introduction
In this guide we will provide an introduction to QVD and will present the basic steps that you will need to take in order to set up and configure QVD server and the various auxiliary components that you will make use of. This guide is intended to help administrators understand how to set QVD up from scratch in a demonstration environment. It will provide the most simple installation and configuration instructions that can be used to get started. It will not go into any detail about additional configuration steps or build functionality, as these details will be covered in the QVD Administration Manual
Please note that while versions of QVD since version 3.1 are capable of supporting LXC virtualization, this guide will explain how to configure the environment for the default KVM virtualization, in order to keep things as simple as possible. If you are interested in configuring your QVD installation to take advantage of LXC, please refer to the chapter titled Using LXC Virtualization in QVD in the QVD Administration Manual
QVD is under continuous development. While we try to keep all of our documentation up to date with the current version, it is possible that some new functionality is provided before the documentation has been updated. If there are sections in this document which are have become obsolete, or if you find that some of the instructions provided do not work as expected, please do not hesitate to contact us.
QVD Installation Guide
1. What is QVD?
QVD (Quality Virtual Desktop) is a Linux focused VDI (Virtual Desktop Infrastructure). The software is designed to entirely virtualize the Linux desktop, so that client systems are able to connect to a central server to load their desktop environment and applications. This means that when users work from their local machine, all of the programs, applications, processes, and data used are kept on the server and run centrally. Virtualization offers a number of benefits:
-
Users can switch between computers on a network and continue to work as if still located at the same desktop, with full access to all of their applications and data
-
Administrators have greater control over the applications that are installed on user’s systems, and are able to manage user data more easily to perform backups and virus scans etc
-
It is easier for Administrators to provision new desktops and to deploy applications for new users
-
There is reduced downtime in the case of hardware failures
-
Users can make use of a variety of different devices to access their desktop and applications, including laptops, PCs and smartphones
-
Users can work securely with the same desktop and applications from a remote location without the requirement for a VPN
-
Improved overall system and data security
-
Reduced costs of hardware, maintenance and administration
The QVD Server virtualizes each Linux Desktop. This can be achieved by using one of two virtualization technologies. Most commonly the Linux Kernel Virtual Machine (KVM) is used as a complete bare-metal hypervisor, however as of QVD 3.1, it is also possibly to take advantage of Linux Containers (LXC) to achieve operating-system level virtualization. This virtualization helps to keep each user’s environment as its own discrete entity, to improve security and stability. Virtualization allows you to serve multiple Operating Systems or environments to your users, depending on their requirements. These are loaded as independent Images on the QVD Server. In general, you will only load one or two images for all of your users. These images provide the base operating system and workstation environment, which are replicated for each virtual machine. When a user connects to the server, making use of the client application, a Virtual Machine is started solely for that user. This provides a jail that prevents any inappropriate system behaviour from affecting other users. When the user disconnects, the Virtual Machine is stopped. This means that if the user’s environment has somehow become problematic, a disconnect can revert the environment to its original state. This provides a much better level of security than if a user was working on an independent workstation.
In order to maintain user data, such as desktop settings, documents and other user specific information, there are two options. The first, and more common approach, is to store this information on an NFS share. In this way, data can be stored on a NAS device or within a SAN, where it can be easily managed. A second option is to load a second image into the virtual machine. This image is persistent, in that it can be updated by the user, and the changes are stored for each time the image is reloaded. Either approach is equally valid. By keeping user data separate from the core image, QVD helps to ensure that in the event that a core image is corrupted or in the event of system failure, you are able to minimize the time needed for disaster recovery.
The desktop is accessed from each workstation, making use of a client that uses the NX protocol to communicate with the server and to deliver the desktop and applications to the client. The NX protocol is used to handle remote X Windows connections and provides superior compression to allow for high performance even when accessing the desktop over a low-bandwidth connection. Furthermore, the QVD is able to encapsulate the NX protocol with SSL to secure connectivity so that users can work in a safe and secure manner, even if accessing their desktops from remote locations. QVD provides client software to run on a variety of base operating systems and devices, from Linux to Windows. This means that wherever you are, regardless of the system that you have access to, you can run the client application to access your Desktop.
1.1. Components and Architecture
In this guide, we will not spend a long time discussing the different components that make up QVD in great detail, however it is important to understand the basic architecture and how each of the components interacts so that you are aware of what needs to be installed and configured in order to get your QVD environment up and running.
QVD 3.5.0 is composed of several parts:
-
QVD client,
-
QVD server,
-
Administration tools,
-
PostgreSQL DBMS,
-
Shared Storage.
These components can be installed on the same system for testing and evaluation. Naturally, if you are installing all components on the same system, you will not need to make use of shared storage, however in a production environment you would usually make this available over some network file system like NFS, OCFS2 or GFS2.
For production use we recommend using separate machines for the database, administration tools, and QVD servers. In order to reduce the complexity of your host networking requirements, we certainly recommend that when testing and evaluating QVD, you run the client from a separate workstation. This will also help you to see QVD functioning in the way that it is supposed to work.
1.1.1. QVD Client
The QVD Client is the application that the User will run in order to access his or her own desktop. QVD provides client applications in a variety of package formats and for a selection of base operating systems, including Linux .deb and .rpm packages for Ubuntu and SUSE Linux distributions and a Windows executable for Microsoft Windows environments. Clients for Android, OS X and iOS are under development.
The QVD Client is a modified NX client that will connect to the QVD Server node, where it will be authenticated before loading the user’s Desktop environment. The client comes with a GUI that makes connecting to a Server a little more user-friendly, but the GUI is not required. In order for the client to connect, it must be configured to provide a user name and password, along with the server node’s FQDN or IP address. There is also an option to control the connection type. For this, there are three possibilities:
-
Local - For connections with high bandwidth, such as a LAN
-
ADSL - For connections with broadband speed bandwidth, such as an ADSL connection
-
Modem - For low bandwidth connections
Changing the connection type controls the amount of compression and caching that is performed by the client. This means that for High Bandwidth connections, less compression and caching is performed and the quality of the desktop display is much better than for lower bandwidth connections.
1.1.2. QVD Server
The QVD Server is also known as a Node, and represents the physical location where a QVD server daemon is running. In an enterprise environment, it is possible that you may have multiple QVD Server nodes to handle high load etc.
QVD Server is responsible for accepting requests from the QVD Client and for loading a Virtual Machine to serve the client request. In order to facilitate authentication requests, and to determine which image to load within the Virtual Machine, QVD Server makes use of a PostgreSQL database which is generally referred to as QVD-DB.
In actual fact, the QVD Server is comprised of two separate core components: Internally, the QVD server consists of a single binary, the HKD, or House Keeping Daemon, which is responsible for starting and stopping virtual machines, and updating status within the PostgreSQL database.
In addition to this, the HKD manages the L7R, a lever-7 router, which is a broker responsible for handling client connections. It ensures that clients are routed to the correct virtual IP address that is configured for the Virtual Machine that has been created for the connecting user. It is also responsible for authenticating the user prior to connection, and for establishing the client session. The HKD starts a listener on each QVD node and forks each incoming connection once it is established.
In order for QVD Server to work correctly, it must have access to the PostgreSQL database, and it must have a properly configured network bridge in place. Configuring the Server can be relatively simple, but there are many options that apply to the L7R and HKD to fine tune behavior. We will not cover these additional options in this document, but will provide the most basic configuration required in order to get QVD Server running.
QVD Server is responsible for loading the image used for the base operating system that will be served to the client, and connecting this with the user home directory. The QVD Server also makes use of overlays that can be used to store temporary data such as log and temporary files. In general, overlays are locally hosted and are destroyed when the Virtual Machine is shutdown. It is possible to make these persistent, by mounting the overlay store on a network share. But we will cover these topics a little later.
1.1.3. QVD Administration
QVD comes with a set of administration tools that help with the configuration of QVD Server, and which allow you to easily add users.
For ease of use, the QVD Web Administration Tool (WAT) should be installed and set up, so that you are easily able to administer the QVD infrastructure. The QVD-WAT provides a simple user interface to monitor the status of QVD, including the Virtual Machines that are running or that have stopped; the sessions that are currently open; and the number of users, virtual machines, nodes, operating systems and images that are used within the solution.
The QVD-WAT also provides tools to manage users, set up Virtual Machines, and upload new images.
In order to function properly, the QVD-WAT needs access to the PostgreSQL database and should have access to the /var/lib/qvd/storage directory. Often, this is mounted across NFS so that images can be shared with the QVD Server Nodes that require them.
Like most of the QVD components, QVD-WAT is coded in Perl. QVD-WAT makes use of the Perl Catalyst framework to facilitate much of its code-base, and includes its own web-server, which runs on TCP port 3000 by default.
It is possible to administer your QVD Solution without installing the QVD-WAT, by using the command line interface. To do this, you will need to install the perl-qvd-admin package. This provides qa, a perl script that is capable of performing any of the administration tasks available through the QVD-WAT from the command line. It also includes some additional functionality that may be useful to an administrator, such as the option to perform a backup of the PostgreSQL database.
|
|
qa was introduced with the QVD 3.1.1 packages, so if you are using an earlier version, you can either symlink it somewhere in your path with the target /usr/lib/qvd/bin/qvd-admin.pl, or just use said target. |
You will need at least one of these two tools to configure your QVD Solution properly.
1.1.4. PostgreSQL DBMS
QVD stores information about users, virtual machines, nodes, operating systems and images within a PostgreSQL database. This database is a central component that is used by each QVD Server Node, as well as the QVD Administration tools. It is used to determine the status of the overall solution and to manage users, sessions and all of the individual components in the solution.
The perl-qvd-admin package includes includes the tools needed to create and configure the database for use within the QVD solution. The PostgreSQL database is not in itself a dependency of perl-qvd-admin but can be readily installed alongside it if it’s desired to have the database itself run on the same machine as the node. It is possible to make use of an existing PostgreSQL installation, and the QVD team can also provide you with advice on how to set up a PostgreSQL cluster for better redundancy and performance, but these topics will not be covered in this guide.
1.1.5. Shared Storage
In a production level deployment, the QVD components are usually installed on separate systems in order to provide better running stability and to ensure that adequate system resources are available for each logically independent task. Nonetheless, the QVD Administration Tools and the QVD Server Nodes need access to shared storage components in order to manage and load system images, user profiles and user data.
QVD keeps all commonly used files in the directory location:
/var/lib/qvd/storage
Within this location there are a number of subdirectories which are usually stored on some form of network accessible shared storage facility, and are mounted according to your requirements. The majority of these directories are related to the type of virtualization that you choose to make use of within your QVD deployment (KVM or LXC).
While we will not be making use of shared storage in this guide, since all of the components will be installed on the same system and will have access to the same storage directories, you should be aware that in a normal environment you will have to configure NFS mountpoints for some of the directories listed below. If you are interested in setting your environment up in this way, please refer to the QVD Administration Manual where the chapter titled Design Considerations and Integration contains information on configuring NFS for QVD.
General Storage
-
staging: temporary location for all DIs that you want available in the QVD-WAT for the purpose of loading as an image. Files located here are available within QVD-WAT when you select to add an image. The image file will be copied out of this directory and into the images folder when it is enabled using one of the administration tools. The staging folder can either be hosted locally or on a network share, but must be accessible to the QVD-WAT.
-
images: location of the DIs (Disk Images) that are loaded by the nodes for each Virtual Machine that is created. These need to be accessible to QVD Server Nodes and to the QVD-WAT. This directory might be stored on a network share, but in a very simple configuration where the QVD-WAT is either not used or is hosted on the same system as the QVD Server Node, it can be hosted locally which will help to improve performance. Note that where KVM virtualization is used, the image is loaded into the virtual machine from this directory. When LXC virtualization is used, the image is extracted from this directory into the basefs directory, before it is loaded.
KVM Storage Directories
-
homes: location of user home data. Under KVM, home data is stored in individual files as qcow2 images. The homes directory should be accessible to all QVD Server Nodes usually on some type of network file share such as NFS, OCFS2 or GFS2.
-
overlays: location used to store overlays for data that is constantly written to the Operating System in order for it to function correctly, such as temporary files and variable data etc. Usually this folder can be hosted locally, but for more persistent behavior in your virtual machines, you can choose to store these on a network share and configure QVD to make your virtual machines persistent.
LXC Storage Directories
Note that while we will not be taking advantage of LXC Virtualization for this guide, it is useful to understand what the other directories within the storage area are used for and how LXC differs from KVM.
-
basefs: location of the DIs (Disk Images) that are loaded by the nodes for each Virtual Machine that is created. These need to be accessible to QVD Server Nodes and to the QVD-WAT. This directory might be stored on an network share, but in a very simple configuration where the QVD-WAT is either not used or is hosted on the same system as the QVD Server Node, it can be hosted locally which will help to improve performance. The basefs folder will contain a subdirectory for each DI, which will in turn contain the complete filesystem tree for a functioning operating system
-
homefs: location of user home data. Under LXC, home data is stored within subdirectories inside the homefs directory, named according to the user-id and the osf-id stored within the QVD-DB. The homefs directory should be accessible to all QVD Server Nodes usually on some type of network file share such as NFS, OCFS2 or GFS2.
-
overlayfs: location used to store overlays for data that is constantly written to the Operating System in order for it to function correctly, such as temporary files and variable data etc. Usually this folder can be hosted locally, but for more persistent behavior in your virtual machines, you can choose to store these on a network share and configure QVD to make your virtual machines persistent.
-
rootfs: location of the running LXC once all required mountpoints have been mounted and configured. Usually this folder is local to each QVD Node Server, for performance, but it could equally be stored within the shared storage space.
2. Planning your QVD Solution
In this guide, we are assuming that you want to set up your first QVD demonstration environment. For this reason, we will assume that the server-side components within the solution will be hosted on the same physical server. We call this a mononode installation. In order to keep things as simple as possible, we will also assume that you will test the solution using the QVD Client installed on a separate workstation. Although it is possible to have all of the components including the client running on the same machine, it is easier to demonstrate the capabilities of the VDI if you connect from a distinct workstation.
Since all of the components will be running on the same system, we will not be too concerned about shared storage. However, it is important to understand that QVD makes use of some common storage between different components in the solution, and that to maximize the potential of your solution it is likely that some of these storage directories should be located on a network file share on a NAS device or a SAN.
With all of this in mind, we will continue to build this solution on a single host to keep things as simple as possible. In reality, it is more than likely that a production environment would keep each of the different components on different systems and the storage would be managed across the different systems that are interacting within the solution. If you feel comfortable configuring NFS shares, and building and installing each component on a different machine, please feel free to do so.
QVD currently has packages for the server-side components available for the SUSE Linux and Ubuntu Linux distributions. This guide will assume that you are installing the packages on Ubuntu 14.04 (Trusty Tahr). The instructions will mostly be similar for SUSE Linux, but where different, we will attempt to provide SUSE commands directly.
2.1. General Requirements
2.1.1. Ubuntu Linux
The QVD components require the Ubuntu 14.04 (Trusty Tahr) GNU/Linux operating system.
Firstly, add the QVD packages public key to your trusted keys (as root):
# wget -qO - https://www.theqvd.com/packages/key/public.key | sudo apt-key add -
Now, add the repository:
# echo "deb http://theqvd.com/packages/ubuntu-trusty QVD-3.5.0 main" > \
/etc/apt/sources.list.d/qvd-35.list
# apt-get update
Execute apt-get update after adding the QVD Ubuntu repository.
The QVD repository provides the following packages:
-
perl-qvd-client: QVD GUI Client software
-
perl-qvd-hkd: House Keeping Daemon for the QVD Server
-
perl-qvd-admin: command line tools for managing users, virtual machines, operating system and images
-
perl-qvd-admin-web: Web Administration Tool (includes Catalyst an MVC web-application framework for Perl)
Each of these packages will have a number of dependencies that can be satisfied by other packages provided from the usual Ubuntu repositories. A summary of other Open Source components required by QVD follows:
-
The PostgreSQL RDBMS.
-
KVM: Hypervisor.
-
LXC: Linux containers userspace tools
-
libvirt0: a library for interfacing with different virtualization systems
-
NX: protocol that handles remote desktop connections.
-
Ebtables: a IP-based firewalling utility for ethernet bridges
|
|
QVD works only on PostgreSQL 8 and above. Ubuntu 14.04 (Trusty Tahr) ships with PostgreSQL 9.3 which is suitable. |
2.1.2. SUSE Linux
The QVD Server Environment can also be installed on the SUSE Linux Enterprise Server 11 (SP3 x86_64).
The packages for the QVD Server Environment are available at
http://theqvd.com/packages/sles/11SP3/stable
Firstly, add the QVD packages public key to your trusted keys (as root):
# rpm --import https://www.theqvd.com/packages/key/public.key
Now, add the repository:
# zypper ar http://theqvd.com/packages/sles/11SP2/stable QVD
# zypper ref
You may be required to provide your installation disk to complete the operation.
The OpenBuild repository used by the QVD provides the following main packages (along with any dependencies not covered in the default SLES repositories):
-
perl-QVD-Client: QVD GUI Client software
-
perl-QVD-L7R: Layer-7 Router authentication component for the QVD Server
-
perl-QVD-HKD: House Keeping Daemon for the QVD Server
-
perl-QVD-Admin: command line tools for managing users, virtual machines, operating system and images
-
perl-QVD-Admin-Web: Web Administration Tool (includes Catalyst an MVC web-application framework for Perl)
As above, Open Source components required by QVD follow:
-
The PostgreSQL RDBMS.
-
KVM: Hypervisor.
-
NX: protocol that handles remote desktop connections.
-
Catalyst: an MVC web-application framework for Perl
-
Ebtables: a IP-based firewalling utility for ethernet bridges
2.2. System Hardware Requirements
The QVD server side components should usually be run on independent systems to ensure that they have adequate resources to run, and hardware requirements will vary depending on the number of users that you wish to service, the number of different Operating System Disk Images that you intend to make use of and various other factors.
For the sake of this guide, which assumes that you are evaluating QVD and will only install a single image and set up a one or two users at most, we recommend the following system hardware requirements as a guideline:
System Processor: 64-bit processor, preferably multi-core. You can support around 8 users per core. 32-bit packages are available for testing but the 4GB RAM limitation for non-PAE modes of x86 processors means that only a limited amount of clients will be possible, and it is certainly not viable for a production environment.
System Memory: At least 2GB RAM. This should be sufficient for up to 4 users.
Disk Space: At least 4GB disk space should be available to contain your operating system image etc. More than likely, you should try to double this to work comfortably with the tools involved in importing an image.
Network Interface: You will need at least one network interface available. A 10/100 Ethernet NIC should be perfectly sufficient. We have succeeded in serving desktops over Wireless connections as well.
You may use any supported client system to run the QVD Client software. At present we support Linux and Microsoft Windows, with beta clients for Android, OS X, and iOS under ongoing development.
2.3. Networking Requirements
QVD Server Nodes make use of a network bridge and virtual network interfaces to facilitate networking across each of the virtual machines that run on the node. In order to automatically provision IP addresses to virtual machines, QVD also runs a DHCP server that will allocate IP addresses within the virtual network range to virtual hosts as they boot up. It is therefore extremely important that you choose a network range that is unlikely to conflict with any of your other existing infrastructure for this purpose. Services running on systems in the same IP network may be affected by QVD or any of the virtual machines that run within QVD.
Networking steps are covered in more detail later in this document, however the most important thing to be aware of at this point is that you should ensure that you have a dedicated network IP range that can be used for the virtual machines that will run within the QVD environment.
Furthermore, in a mononode installation, such as the one that we are describing here, you will need to configure some form of NAT in order for the virtual machines to have network access. This is usually achieved by configuring some iptables rules on the host. In this document, we provide an example, but you may find that an alternative approach is more suited to your environment.
3. Installing the QVD Demo Virtual Machine
The QVD provides a demo VirtualBox appliance in the form of an OVF Image that you can download and run with a minimum of fuss inside the freely available VirtualBox software. If you don’t have VirtualBox installed, you can download it from the website https://www.virtualbox.org/wiki/Downloads or follow the instructions there obtain it for your particular operating system. Since you will will be running the demonstration from a purely virtualized environment, this means that you will be able to try out the software from a range of different environments and without having to make any substantial changes to your own setup.
The VM image can be found here and is about 3.5GB in size:
Once downloaded, start the VirtualBox software and select "Import Appliance" from the File menu. Choose the QVD demo that you have downloaded and click Next. This will bring you to the Appliance Import Settings screen.
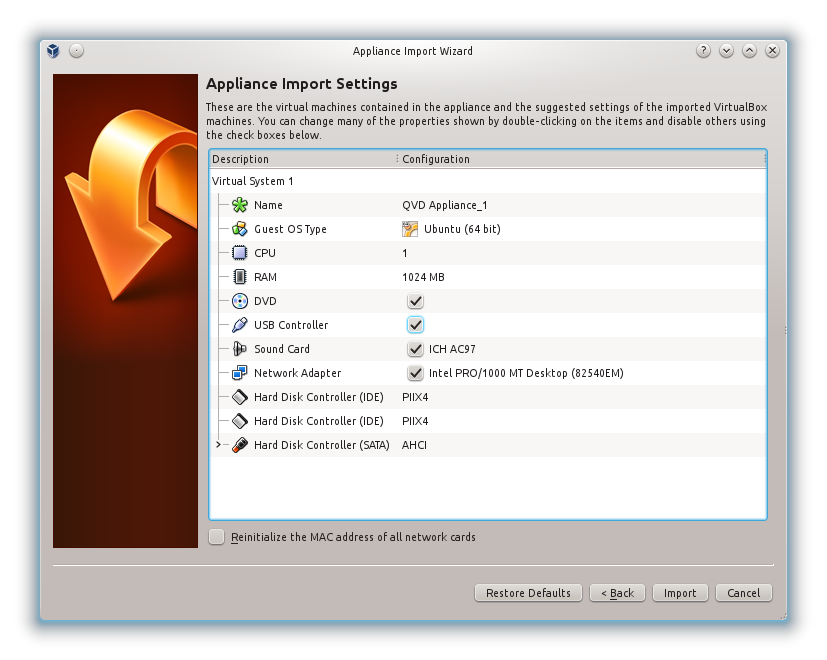
We don’t recommend that you change anything at this juncture, so click the Import button and give VirtualBox a couple of minutes to complete the import. Back in the main VirtualBox screen, you should now have the new machine "QVD Appliance".
|
|
By default, QVD uses ports 8443 for the Layer 7 Router and port 3000 for the Web Administration tool. Additionally, port 2222 is used for ssh access. Providing access to these ports on a guest OS in VirtualBox can be achieved by using NAT and setting the VirtualBox networking engine to map these ports to the guest. This is set up already in the QVD Appliance. It is important to note that these ports must not already be in use on the local machine or this will not work properly. |
To start the QVD Appliance, simply select it in the list of VMs in VirtualBox, and click the start button. This will boot up the machine and bring you to a console login screen. The default username and password is qindel, although you shouldn’t need to log in just yet to test out the software.
|
|
If you choose to use the QVD demo appliance, you can skip through a lot of this document. Please note, however, that this demo is unsupported and in no way provides a production ready solution. To fully understand how the components of QVD work together, we highly recommend that you continue to read through this document, but if you simply wish to see the software working you should be able to pick up the demo in the Installing and Configuring QVD Client section. |
4. Installing and Configuring QVD DB
Since one of the most fundamental components in the QVD solution is the QVD database, we suggest that you install this first. The database will be used to tie all of the other components together and to enable them to interact. The QVD software has a PostgreSQL database at its core. All the configuration and runtime information is stored in the database and if it fails the full platform will stop working.
On production systems, it is highly recommended that the database is installed in a high availability configuration, so that it does not become a likely point of failure for your VDI solution. In general, the actual hardware requirements are very modest, any modern server with just two CPU cores and 2GB of RAM will be able to support the database load.
In this demonstration configuration, it is unlikely that you will generate much load and we will assume that your test platform will be able to cope with the requirements.
4.1. Installation
The preferred way to install the central database is with the package perl-qvd-admin. To install run as root:
root@myserver:~# apt-get install perl-qvd-admin
After installing perl-qvd-admin you have to perform various manual steps. They are
-
creating a user account,
-
creating a database,
-
changing the database configuration, and
-
deploying the QVD database schema.
Because QVD is designed to run from one or more node server the perl-qvd-db package does not require the postgresql server as a dependency. For the purposes of this installation guide, however, we will need the server installed on the local machine. Of course, you could of course use a server on another machine and adapt your config accordingly. Install that as follows for Ubuntu:
# apt-get install postgresql
And for SLES:
# zypper install postgresql-server
Now, start the postgresql server:
# service postgresql start
You will need to create a user account and database in postgres, so su to the postgres account (use sudo if not root):
# su - postgres
4.2. Creating a user account
If you wish to use an existing user account you can skip this step.
Once you have access to the database, you can create user accounts with the createuser command. It will prompt for a password for the new user and ask some details on the user account. You can answer n to all.
For example, to create a user called qvd you would use the following command.
postgres@myserver:~$ createuser -SDRP qvd
Enter password for new role: passw0rd
Enter it again: passw0rd
The new user can now be assigned as the owner of a database. First we need to create the QVD database.
4.3. Creating the QVD database
Use the createdb command to create a database for QVD. Use the -O switch to set the database’s owner to the account you wish to use. In this case we will set the owner to the new user that we created in the previous step.
postgres@myserver:~$ createdb -O qvd qvddb
4.4. Changing PostgreSQL configuration
In a production environment where multiple systems interact with the QVD Database, QVD uses transactions extensively, and requires a higher level of transaction isolation than is configured by default. Furthermore, you would generally want PostgreSQL to be accessible to other hosts on your network. While this step is optional in the standalone solution that we are creating in this guide, you might want to configure these settings to ensure that your system is ready to handle additional QVD Server Nodes. To do this you must edit the PostgreSQL configuration file postgresql.conf. We will assume you are using PostgreSQL 9.3, you may need to adjust some paths as necessary.
On Ubuntu configuration files are located in /etc/postgresql/9.3/main.
On SLES configuration files are located in /var/lib/pgsql/data
The transaction isolation level is controlled with the default_transaction_isolation setting. To enable network access to PostgreSQL in general, change the listen_addresses setting from localhost to *.
For Ubuntu:
root@myserver:~# cd /etc/postgresql/9.3/main
root@myserver:/etc/postgresql/9.3/main# vi postgresql.conf
listen_addresses = '*'
default_transaction_isolation = 'serializable'
And for SLES:
root@myserver:~# cd /var/lib/pgsql/data
root@myserver:/var/lib/pgsql/data # vi postgresql.conf
listen_addresses = '*'
default_transaction_isolation = 'serializable'
|
|
While the previous step was optional for a standalone configuration, the following step is not. You will need to configure network access for the QVD user that you have created. |
To enable network access for the user qvd, locate the file pg_hba.conf. For Ubuntu this will be in /etc/postgresql/$VERSION/main and for SLES, /var/lib/pgsql/data. Edit this file and add the following line:
host qvddb qvd 192.168.0.0/24 md5
|
|
Make sure to replace the default network 192.168.0.0/24 with the network that your platform uses. The format is as follows: host database user CIDR-address auth-method [auth-options] |
Restart PostgreSQL for the changes to take effect.
root@myserver:~# service postgresql restart
4.5. Base Configuration
Each QVD node uses a configuration file /etc/qvd/node.conf from where it gets, amongst other settings that we will cover later, the database credentials and host name. Once you have finished setting up postgresql, you will need to create this node configuration file. You should have perl-qvd-config-core installed at this point as a dependency, which contains a sample node.conf file. Make the qvd folder in /etc, and copy this template configuration there:
root@myserver:~# cp -v /usr/lib/qvd/config/sample-node.conf /etc/qvd/node.conf
Obviously the permissions on this file need to be as restrictive as possible. The root user and the apache user will both need read access. For Ubuntu, the default apache user is www-data, so let’s change the ownership:
root@myserver:~# chown root:www-data /etc/qvd/node.conf
For SLES, replace www-data with wwwrun as that is the default apache user.
Now, make the file unreadable by anyone outside of the owner and group:
root@myserver:~# chmod 0640 /etc/qvd/node.conf
Now you will need to edit the file /etc/qvd/node.conf to include the details needed to access the database. Your configuration file should look like this:
#
# QVD Node Configuration
#

# Name of this node in QVD. Usually the machine's hostname.
nodename = mycomputer

# Database connection information.
# database.host: where the QVD database is found
database.host=mycomputer
# database.name: the name of the QVD database
database.name=qvddb
# database.user: the user account needed to connect
database.user=qvd
# database.password: the password needed to connect
database.password=passw0rd

# Log level. One of ALL, DEBUG, INFO, WARN, ERROR, FATAL, OFF
log.level = ALL
log.filename = /var/log/qvd/qvd.log
First, the nodename entry and the database.host entry should match your machine’s hostname, so the example above does need some editing.
The database host should also match the hostname or IP address for the system where your database is located. By default the database name is usually set to qvddb but for customized installs, this may be different. You will also need to set the database username and password, which you configured when you set up the database.
Finally, you may optionally add a log level for troubleshooting purposes.
4.6. Installing the QVD tables
It is now time to populate the database with the tables that will be used to hold data for QVD. Before we can use any of the QVD tools, we will need to configure the database, user name and password in the QVD configuration files.
Once done, execute qvd-deploy-db.pl. It creates the table structure that QVD needs.
# /usr/lib/qvd/bin/qvd-deploy-db.pl
|
|
You will get an authentication error at this point if you have not used the username and password combination as the above example. To change the details to match the ones you have used, edit the file /etc/qvd/node.conf. We will go into further detail about this file shortly. If you get an error "Can’t deploy without a ddl_dir or SQL::Translator" you will need to apt-get install qvd-node-libs at this point. |
4.7. Testing access
Login to postgresql and issue the following command to list the tables used by QVD:
# psql -U qvd -W -h localhost -d qvddb
Password for user qvd:
psql (9.1.5)

qvd=> \d<return>
5. Installing and Configuring QVD Server
5.1. Installation
It is now time to install the QVD Server. To do this, ensure that you have root privileges:
root@myserver:~# apt-get install perl-qvd-hkd
for Ubuntu, and for SLES (where the packages are separated out):
root@myserver:~# zypper install perl-QVD-HKD
This will install all of the QVD server utilities, as well as all of the dependencies required to run a QVD Node.
|
|
It’s crucial that all nodes in a QVD install are time synchronized, i.e. use of NTP is essential, or the system may behave unpredictably. Unless you are using Xen or similar and all boxes are synchronized by the host machine, you will need to install the appropriate NTP package for your system (named ntp for both Ubuntu and SLES) on each system that is to be a node, and configure each one to synchronize with a central NTP server. Since your nodes may not all have access to the internet, it might be a good idea to have one device on your network act as the local time server for the others, and this also makes correlating system events easier. That is beyond the scope of this guide, please see http://ntp.org for further information. |
It is also worthwhile installing the QVD CLI Administration utility at this point to help with some of the steps that you will perform during this phase of the setup process. The QVD CLI Administration utility is included in the perl-qvd-admin package, so more than likely you will already have it installed. Nonetheless, it is possible that you have decided to install the different components on different hosts, so for the sake of completeness, you can install this utility as well.
root@myserver:~# apt-get install perl-qvd-admin
For SLES:
root@myserver:~# zypper install perl-QVD-Admin
This useful tool permits scripting all the operations that can be performed using the web administration tool in the perl-qvd-admin-web package. You can install it on any host that you want to use to manage your QVD Server. For instance, you may want to integrate QVD with an external monitoring tool such as Nagios, so installing the QVD CLI Administration utility on this host would make this possible.
The QVD Administration utility requires access to the QVD Node configuration file in order to function properly. We will set this up in the next step, but it is worth keeping in mind that if you want to install this utility on any other host, you should copy the QVD Node configuration file to the host where you intend to run the tool.
5.2. Setting Internal QVD Configuration Parameters
While it is possible to add other configuration parameters to the QVD Node Configuration file that we edited above, this file is simply used to bootstrap the server and thereafter the server will refer to the database to find any other configuration entries, so it is better practice to set QVD configuration parameters within the database.
There are some parameters that must be defined in order to tell QVD about its environment (for instance, the range of IPs available for the virtual machines or their default gateway). These parameters are mandatory and the QVD daemons will refuse to start unless they are defined. They are as follows:
-
vm.network.ip.start: first IP of the range allocated for the virtual machines on the bus network
-
vm.network.netmask: size in bits on the bus network address
-
vm.network.gateway: IP of the firewall on the bus network that will be passed by DHCP to the virtual machines
-
vm.network.bridge: Name of the bridge interface
-
vm.network.dns_server : IP of the DNS service to be configured by DHCP on the QVD bus network.
These entries can be set on the database using the command qa available from the perl-qvd-admin package as follows:
# qa config set vm.network.ip.start=10.3.15.50
# qa config set vm.network.netmask=24
# qa config set vm.network.gateway=10.3.15.1
# qa config set vm.network.bridge=qvdnet
# qa config set vm.network.dns_server=8.8.8.8
You can also use this tool to set the QVD-WAT username and password:
# qa config set wat.admin.login=admin
# qa config set wat.admin.password=admin
5.3. Networking Requirements
QVD Server Nodes make use of a network bridge and virtual network interfaces to facilitate networking across each of the virtual machines that run on the node. In order to automatically provision IP addresses to virtual machines, QVD also runs a DHCP server that will allocate IP addresses within the virtual network range to virtual hosts as they boot up. It is therefore extremely important that you choose a network range that is unlikely to conflict with any of your other existing infrastructure for this purpose. Services running on systems in the same IP network may be affected by QVD or any of the virtual machines that run within QVD.
There are a number of configuration steps that may need to be configured manually in order to properly set up the networking for a QVD Server Node. There are often other ways to achieve an appropriate network configuration, so we provide these only as guidelines.
5.3.1. Set dnsmasq to be controlled by QVD
QVD uses dnsmasq as a DHCP and DNS server for the virtual machines that run in a node. In order to function correctly, dnsmasq needs to be run by the HKD process.
Firstly, check that dnsmasq is installed. On Ubuntu, issue the following command and check the Status:
# dpkg -s dnsmasq
On SUSE, try:
# rpm -q dnsmasq
If it’s not installed, go ahead and do so, using your package manager, either apt-get install dnsmasq, or zypper in dnsmasq.
By default, the Ubuntu package starts the process running as a daemon in the background, so you need to stop it from starting automatically. This is done with the following commands on Ubuntu:
# service dnsmasq stop
# sed -i s/ENABLED=1/ENABLED=0/ /etc/default/dnsmasq
On SLES dnsmasq is managed under the chkconfig command and is disabled by default, so you shouldn’t need to do anything here. However, in case dnsmasq has been enabled or to be on the safe side, you can ensure that it is turned off by running the following command as root:
# chkconfig dnsmasq off
|
|
This step is essential in order for QVD to work using KVM virtualization. For LXC virtualization, it is possible to specify whether or not to make use of DHCP to configure the networking within your virtual machines. |
5.3.2. Configure IP forwarding
IP Forwarding is required in order to route clients to the correct location. You can do this quickly by running the following command.
# echo 1 > /proc/sys/net/ipv4/ip_forward
Unfortunately, when you reboot you host system, this change will be lost. To make it permanent, you can edit /etc/sysctl.conf and uncomment the line:
net.ipv4.ip_forward=1
You can force sysctl to reload its settings after you have edited this file by running:
# sysctl -p
5.3.3. Configure a Network Bridge
There are a number of ways to go about configuring your network bridge and the appropriate routing to make sure that a QVD client is routed to the correct virtual machine.
The easiest method is to set up a static network interface and to configure a set of iptables routing rules to perform the NAT required to translate IP addresses between your real and virtual network interfaces. Using NAT is necessary within a mononode installation, but on a deployment using multiple nodes and where different components run on different systems, the iptables routing rules would not be necessary.
To configure you networking on Ubuntu, edit the file /etc/network/interfaces and add the following lines:
auto qvdnet0
iface qvdnet0 inet static
  pre-up brctl addbr qvdnet0
  pre-up iptables -t nat -A POSTROUTING -o eth0 -j SNAT --to-source 192.168.0.2
  pre-up iptables -t nat -A PREROUTING -d 192.168.0.2 -p tcp --dport 8443 -j DNAT --to-destination 10.3.15.1
  post-down brctl delbr qvdnet0
  address 10.3.15.1
  netmask 255.255.255.0
It is important to note that in the above example you will need to change the IP address 192.168.0.2 to the IP address of the network interface that you intend your clients to connect to. In the example above we are using the 10.3.15.0/24 range for the virtual network used by QVD. This range should be unique within your infrastructure and should be dedicated to QVD usage, so that services starting within QVD do not impact on other systems within your network.
While there are other cleaner approaches to setting up your network, these sometimes run into problems with particular network interfaces such as WIFI. The approach listed above should work for most systems. Remember that the NAT provided using iptables, as presented in the example above, is only required for mononode installations.
Once you have written the network configuration to file, you should bring up the network bridge interface.
# ifup qvdnet0
5.3.4. Configure QVD for your Networking
In order for QVD to properly manage virtual machine setup and the subsequent routing, you will need to change some configuration settings within QVD-DB. It is recommended that you make use of the QVD CLI Administration Utility to do this.
These settings are used to provide a dedicated networking environment for your virtual machines to run. You should use IP addresses and network ranges that do not conflict with your existing network infrastructure. In the example below we are using the 10.3.15.0/24 range for the virtual network used by QVD. This range should be unique within your infrastructure and should be dedicated to QVD usage, so that services starting within QVD do not impact on other systems within your network.
# qa config set vm.network.ip.start=10.3.15.50
# qa config set vm.network.netmask=24
# qa config set vm.network.gateway=10.3.15.1
# qa config set vm.network.dns_server=10.3.15.254
# qa config set vm.network.bridge=qvdnet0
|
|
If you are running AppArmor on your host machine, you may find that it prevents the host machines from accessing the internet. We are working on an AppArmor profile for QVD that will be made available in due course. For now, suffice to say that tearing down your current AppArmor profiles with /etc/init.d/apparmor teardown will stop AppArmor from preventing the QVD from running. If this is unacceptable due to a production environment, please get in touch with support. |
These settings are described in more details in the section of the QVD Administration Manual entitled Virtual Machine Options in the Base QVD Configuration chapter.
5.4. Configuring SSL
The QVD server needs an x509 certificate and private key for securing network connections. For a production installation you should use a certificate issued by a recognized certificate authority, such as Verisign or Thawte. For testing purposes you can use a self-signed certificate. In this demonstration, we will step through creating a self-signed certificate, and use this within our configuration. If you already have a certificate signed by a third party, you can skip this step and use your signed certificate instead.
5.4.1. Creating a self-signed certificate
The openssl tool is required for creating a self-signed certificate. If you have not already installed it you can do so using the Ubuntu repositories:
# apt-get install openssl
Or if you are using SLES:
root@myserver:~# zypper install openssl
We recommend that for working with your certificates, you create a subdirectory in /etc/qvd.
# mkdir /etc/qvd/certs
# cd /etc/qvd/certs
In order to create your certificate, you must first generate a private key.
# openssl genrsa 1024 > server-private-key.pem
Given the private key, a self-signed certificate is created with the following command.
# openssl req -new -x509 -nodes -sha1 -days 365 -key server-private-key.pem > server-certificate.pem
OpenSSL will prompt you to enter the various fields that it requires for the certificate. You should enter relevant information into these fields. The most important field is the Common Name field which should match the fully qualified domain name of the host that will be running your QVD node. Also keep in mind that this is an example so the certificate isn’t trusted for any CA and is just valid for 365 days after its creation.
You are about to be asked to enter information that will be
incorporated into your certificate request.
What you are about to enter is what is called a Distinguished Name or
a DN.
There are quite a few fields but you can leave some blank
For some fields there will be a default value,
If you enter '.', the field will be left blank.
+++-----+++
Country Name (2 letter code) [AU]:ES
State or Province Name (full name) [Some-State]:Madrid
Locality Name (eg, city) []:Madrid
Organization Name (eg, company) [Internet Widgits Pty Ltd]:Qindel Group
Organizational Unit Name (eg, section) []:QVD Team
Common Name (eg, YOUR name) []:qvd.qindel.com
Email Address []:documentation@theqvd.com
You will now have a self signed certificate and its corresponding private key.
5.4.2. Configure QVD to use the SSL Certificates
In the previous step we created a directory /etc/qvd/certs to store our self-signed certificate. If you are using a certificate signed by a recognized CA, you may want to put your certificates into the same place in order for the following instructions to make sense.
In this step, we will configure QVD to make use of the server certificate and private key. To do this, we will use the qvd-admin tool.
# qa config ssl key=/etc/qvd/certs/server-private-key.pem cert=/etc/qvd/certs/server-certificate.pem
If the certificate isn’t signed by a trusted authority, it has to be added to the system’s trusted certificates directory so that the SSL layer can validate it. To work out what that directory is, run the following command:
# openssl version -d
The trusted certificates directory is always a subdirectory named certs within the directory returned by the above command.
For example, the command may return the following response:
OPENSSLDIR: "/usr/lib/ssl"
This would indicate that the your trusted certificates are stored in /usr/lib/ssl/certs on Ubuntu, or in /etc/ssl/certs on SLES. In most cases this is actually a symlink to somewhere else, but this path should be sufficient to work with.
In order for SSL to recognize the certificate, it needs to be named correctly. The following commands will help you to ensure that the certificate is named correctly.
# trusted_ssl_path=/usr/lib/ssl/certs
# cert_path=/etc/qvd/certs/server-certificate.pem
# cert_name=`openssl x509 -noout -hash -in $cert_path`.0
# cp $cert_path $trusted_ssl_path/QVD-L7R-cert.pem
# ln -s $trusted_ssl_path/QVD-L7R-cert.pem $trusted_ssl_path/$cert_name
Of course, regardless of your distribution, it is important that you check both the trusted_ssl_path and the cert_path in the commands listed above, and change them, if required, to match your environment.
The commands listed above will first ensure that we get the correct name for your certificate, and then will copy the certificate to the path where your trusted certificates should be stored, renaming it to QVD-L7R-cert.pem so that it has a name that you will be able to make sense of later. Finally, we create a symlink from the certificate to the name that OpenSSL expects in order to use the certificate file.
6. Installing and Configuring QVD-WAT
The QVD Web Administration Tool (QVD-WAT) is a simple interface that makes it easier to administer and manage your QVD Server Nodes and to monitor active client sessions within your infrastructure. It also gives you the ability to manage QVD Server nodes from remote locations.
Although not strictly required to run QVD, it will certainly help you to get started with the product, so we will install it and configure our server node using this facility.
6.1. Installation
Before proceeding with the installation, it should be noted that as of Ubuntu 14.04, one of the dependencies of the WAT (namely, the package libapache2-mod-fastcgi) is no longer distributed among Ubuntu’s main repository. If you’re installing the QVD WAT in Ubuntu 14.04 or later, you should edit the file /etc/apt/sources.list and uncomment the lines referring to the multiverse repository, then issue an apt-get update to make APT aware of the newly available packages.
Install the package with apt-get:
# apt-get install perl-qvd-admin-web
Or using zypper on SLES:
# zypper install perl-QVD-Admin-Web
QVD-WAT makes use of the database connection details within the QVD Node configuration file at /etc/qvd/node.conf. Since we are installing all of the components on a single host, the existing file should not need to be edited. However, if you have opted to install each component on a different host, you could copy the configuration file from your QVD Server Node host to the host that you are using to run QVD-WAT.
6.2. Running
As of QVD 3.1, the Web Administration Tool uses the Apache web server (as well as bundling a compatible version of libcatalyst-perl, previously a dependency). The packages provide a basic site file /etc/apache2/site-enabled/qvd-wat.conf, which you may wish to have amend if necessary, though that shouldn’t be necessary for most vanilla setups.
You will need to restart apache afterwards if you do make changes:
|
|
If your apache version is 2.4 or higher it is neccesary to modify the /etc/apache2/sites-available/qvd-wat.conf and include in the <Directory> directive the following statement: Require all granted . |
<Directory />
  Options Indexes FollowSymLinks ExecCGI
  AllowOverride None
  Require all granted
</Directory>
# service apache2 restart
or
# /etc/init.d/apache2 restart
if you are using SLES.
Now you can test the connection in your browser, visiting http://localhost:3000
To login, you can use the default username and password:
-
username: admin
-
password: admin
After that, you should change the default password using:
# qa config set wat.admin.password=newpassword
6.3. Add Your QVD Server Node
Now that you are able to connect to QVD-WAT, you will need to register the QVD Node Server that you have configured as a node within the QVD infrastructure. To do this, you can click on the Nodes link at the top of the page, or go to http://localhost:3000/hosts/.
|
|
If you installed the QVD Demo Appliance, you do not need to follow this step, as the metapackage automatically adds the details for the Server Node that it sets up directly into the QVD database. |
Click on the New button and you will be presented with a screen that looks like this:
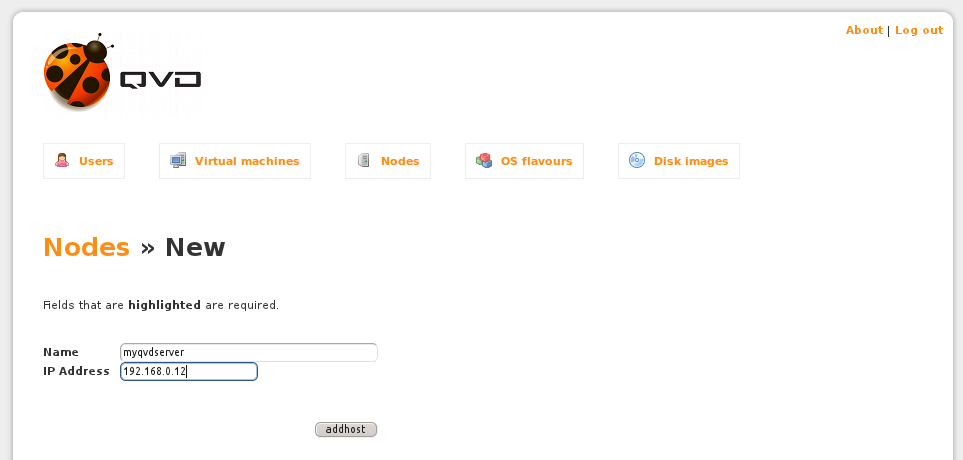
Enter the Name of the host node that you are adding, in this example setup this should match the name of the node that you have set in the node.conf file.
Also enter the IP address of the host that is running your QVD Server. This should be the externally facing IP address that you expect client applications to connect to.
Finally, click on the addhost button to save the information that you have just entered.
If you wish to do this via the command lines, simply type in the following:
# qa host add name=<name for the host> address=<address of the host>
Of course, replace with the correct info as needed.
6.4. Installing Your First Image
In order for QVD to serve a desktop to a user, you will need to create an OSF (Operating System Flavour) and assign a DI (Disk Image) to it. The OSF allows you to provide different users with different operating systems, or simply to provide different applications or environments to users with different requirements. As already mentioned, the image is loaded into its own virtual machine for each user that connects to the server. This means that you can have one image that is used to serve multiple users. On the other hand, you can install as many images as you require, so that in a worst case scenario you have a different image for each user.
6.4.1. Download a demonstration Disk Image
Since we just want a quick method to get started, we are not going to go to the trouble of creating our own image. Instead, we will simply download a DI (Disk Image) from the QVD website. You can download the image from the following link:
Once you have finished downloading the image file, you will need to move it to a location that can be used by the QVD-WAT. Toward the beginning of this document, we mentioned that QVD makes use of a number of common storage directories. In particular, the directory located at /var/lib/qvd/storage/staging is used by the QVD-WAT as a temporary directory to store image files that will eventually be used by QVD Server Nodes to load into a virtual machine. Therefore, you should move the image file that you have downloaded into this directory:
# mv qvd-demo.img /var/lib/qvd/storage/staging
6.4.2. Load the image into QVD
Now you need to load the image that you have downloaded into QVD and set the amount of memory that you want the virtual machine to make available to the image. To that end, you need to create an OSF and then assign a DI to it.
In QVD-WAT, click on the OS Flavours link in the navigation bar, or go to http://localhost:3000/osf/.
Now click on the New button to add an operating system. You will be presented with the following screen.
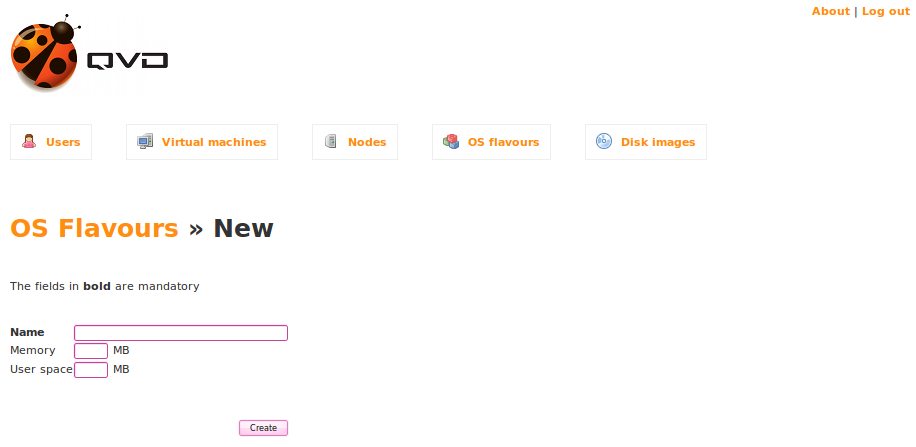
In the Name field, provide a name for the OSF. Usually you would name an OSF providing some indication of its purpose. So something like AccountingUsers might make sense if the OSF is going to be used to provision applications used only by Accounting staff members.
The Memory field is used to allocate system memory to the Operating System. It has a default setting of 256 MB. This field is not compulsory unless you want to change the default value to suit the image better. The demo operating system uses LXDE which has a minimum requirement of 45 MB of RAM so you can leave this blank. However, on production systems, you may want to increase this to at for more resource hungry desktop environments such as KDE and Gnome.
The User space field is used to allocate disk space to a user for the purpose of storing a home directory. By default, this option is usually not set. This means that a user’s home directory should either be mounted using a network fileshare within the OSF, or the home directory will not be persistent. Setting a value here will create a virtual disk of the size specified. This helps to enforce quotas and to prevent user home directories from being accessible to each other across Virtual Machines. For evaluation purposes, you can leave this field blank, but remember that any data that you create within your virtual desktop will only be available for as long as the virtual machine is running. If you restart the virtual machine, the home directory will be lost and it will be reset to its original state. If you want to store data for your home directory, you can set this to an acceptable size. For demonstration purposes, you should set it to 1024 MB, providing your user with around one gigabyte of disk space to work with.
Now to create the DI, in QVD-WAT, click on the Disk Images link in the navigation bar, or go to http://localhost:3000/di/.
Now click on the New button to add an image. You will be presented with the following screen.

The newly created OSF will appear in the OS Flavour selection box. Select it by clicking on it.
If you have moved your image file into /var/lib/qvd/storage/staging you will see it listed in the Image file selection box. Click on it to select it as the image that you want to use.
Finally, there is a checkbox that allows you to Delete after action. This option is available because the original image file is copied to /var/lib/qvd/storage/images once you have loaded it into QVD. You may want to delete the image file from the staging directory to save disk space, but you may equally want to reuse it with alternative memory and user space settings for another group of users. It is optional to delete the temporary image file, but during evaluation we recommend that you keep it unless disk space is at a premium.
Click on the Create button to load the image.
On the command line, you could use the following to achieve the same:
# qa osf add name=<name of the host>
6.5. Adding Your First User
If you click on the Users link in the navigation bar, or go to http://localhost:3000/users/, you are able to add new users to QVD and manage any existing users. At this point, you will have no users listed. It is time to add a new user.
Click on the New button to add a user. You will be presented with the following screen:
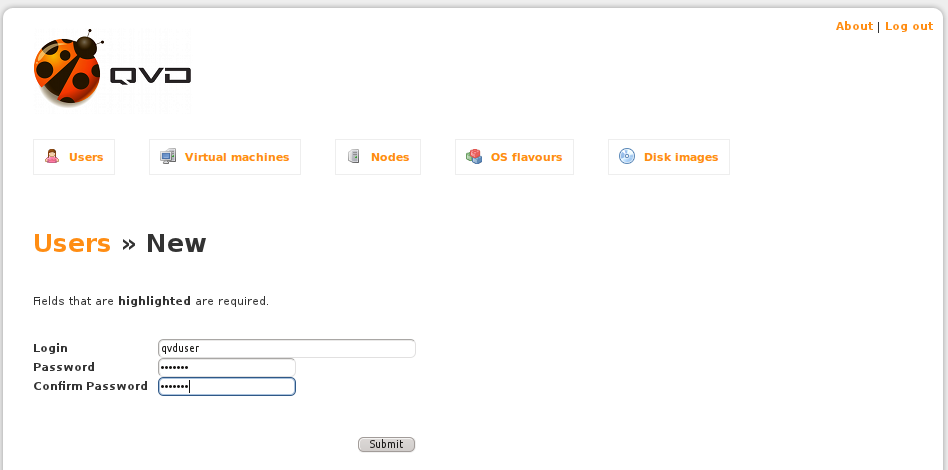
Enter a Login name for the user. This should be a standard Linux username, usually in lowercase and with no spaces or reserved characters. For the purpose of this guide, we suggest you enter a username like qvddemo.
Enter a Password for the user. This should be a normal Linux password, although there are no limitations on length. In the spirit of reasonably good security, we recommend that the password is at least 6 characters long and contains uppercase, lowercase and numerical characters. Something like 54ghFe9 would be a sensible choice.
You will need to re-enter the password in the Confirm Password field.
Click on the Submit button to create your user.
Adding users on the command line is just as easy:
# qa user add login=<user> password=<password>
There’s an important caveat to this: you shouldn’t create any user whose username matches any one already existing in the disk images. Examples of this are sys, mail, nobody, etc. Attempts to do this will cause permission issues when the user connects to their virtual desktop and the NX session is established, making it impossible to get to the desktop.
6.6. Attaching a Virtual Machine To A User
Once you have added a user, you will return to the Users screen in the QVD-WAT and you will see your user listed here. The user will have been allocated an ID. If it is your first user, this will more than likely be 1. You will notice that this ID is also a link, and a magnifying glass icon is displayed alongside it.
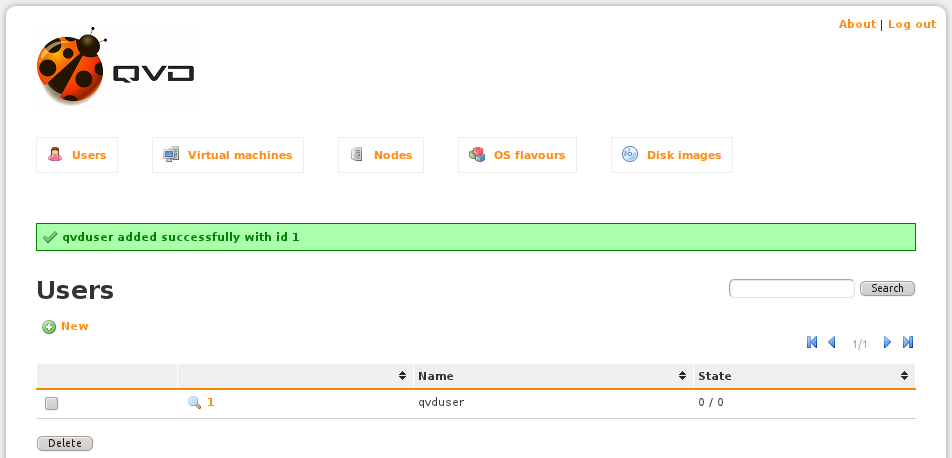
If you click on the ID link or magnifying glass icon, you will be taken to a new screen where you are able to assign a Virtual Machine to a user, or change the User’s password.
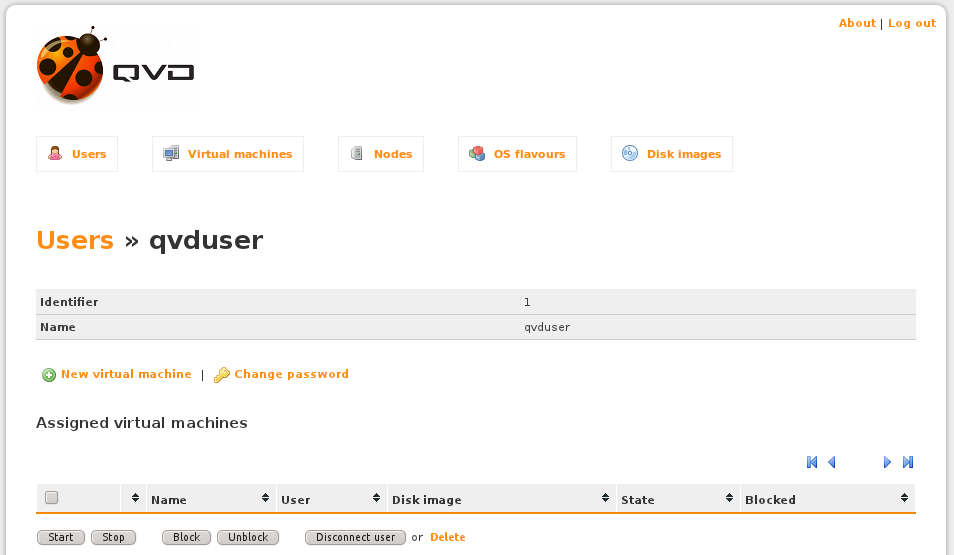
At this point, there are no Virtual Machines set up within QVD. We can add a new Virtual Machine and assign it directly to the current user from this page.
|
|
It is important at this stage that the House Keeping Daemon is up and running. Since there is no way (yet) to do that from within the QVD-WAT tool, you will need to drop into the command line and enter service qvd-hkd start. You can check that it is running with service qvd-hkd status. If it’s not running for any reason, you will need to take a look at the logs and try to determine the reason for this. Without the hkd, we cannot get the new VM we are about to create to run. |
Once you are happy that the hkd is up and running, click on the New Virtual Machine link.

You will arrive at a screen that looks like this:

Here, you only need to provide a name for the Virtual Machine instance, and select the image that should be loaded into the Virtual Machine.
In the Name field, enter a useful name for the Virtual Machine. Usually something like a combination of the Username and the Image name would make sense here. So something like QVDUser-Accounting.
Now simply double click on the Image that you wish to load into this Virtual Machine.
If everything behaves correctly, this should bring you to a page that looks like this:
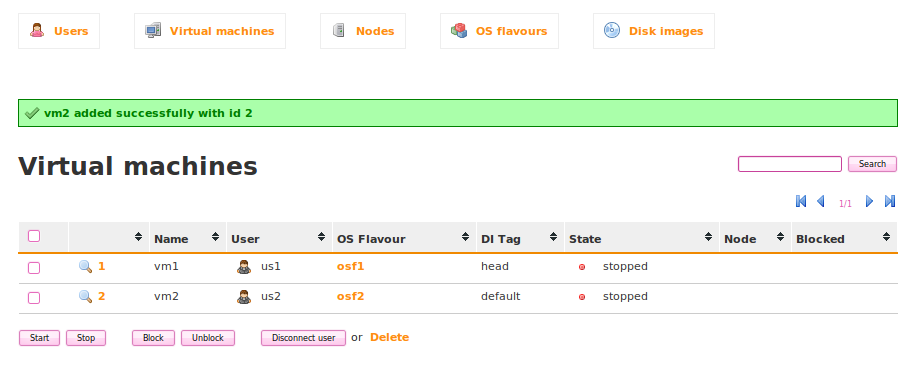
This page is also accessible by clicking on the Virtual machines link in the navigation bar, or by going to http://localhost:3000/vm/.
From this page, it is possible to see the status and manage any Virtual Machine within QVD. At this point, we want to see QVD in action, so we will not spend any more time discussing the options available here.
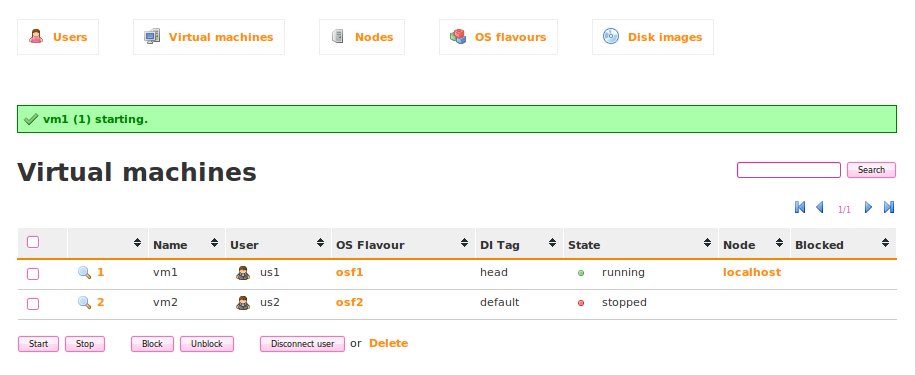
Simply check the checkbox next to the listed Virtual Machine and then click on Start. After a minute or two, you should see the Virtual Machine State change through various phases of the boot process. If everything goes well, you should eventually see that the State changes to running.
To add a Virtual Machine on the command line, enter the following:
# qa vm add name=value <user_id=value> <osf_id=value>
Make sure you match up the user_id and osf_id values with the user and osf instance you want. If you are unsure of these, you can query the values like this:
# qa user list
# qa osf list
Each command will return an id for the user and the osf options respectively that you can use.
From this point, you should be able to connect to QVD using a client and connecting as the user that you have just created.
7. Installing and Configuring QVD Client
The QVD client is available for both Linux and Microsoft Windows platforms. Certainly, we recommend that for more seamless integration you should consider running the client on a Linux platform. However, it is quite possible that you have users that make use of both environments and would like to run a virtualized Linux desktop from within Windows.
Whatever your choice of platform to run the client application, it is best that you run it on a different system to the one that you are using to run server side components. This will give you a much better picture of how the whole environment works.
7.1. Downloading and Installing the Windows Client
If you are using Microsoft Windows as your base platform to run the QVD Client application, you will need to download the QVD Client installer manually. You can download the installer from:
Once you have finished downloading the installer, run it as a normal executable file and follow the wizard through the installation process.
Once you have finished the installation, you can either run the client from the shortcut on your Windows desktop (if you selected to add the shortcut) or from the QVD menu in your Applications menu. This will open the client so that you are ready to connect.
Downloading and Installing the QVD Client
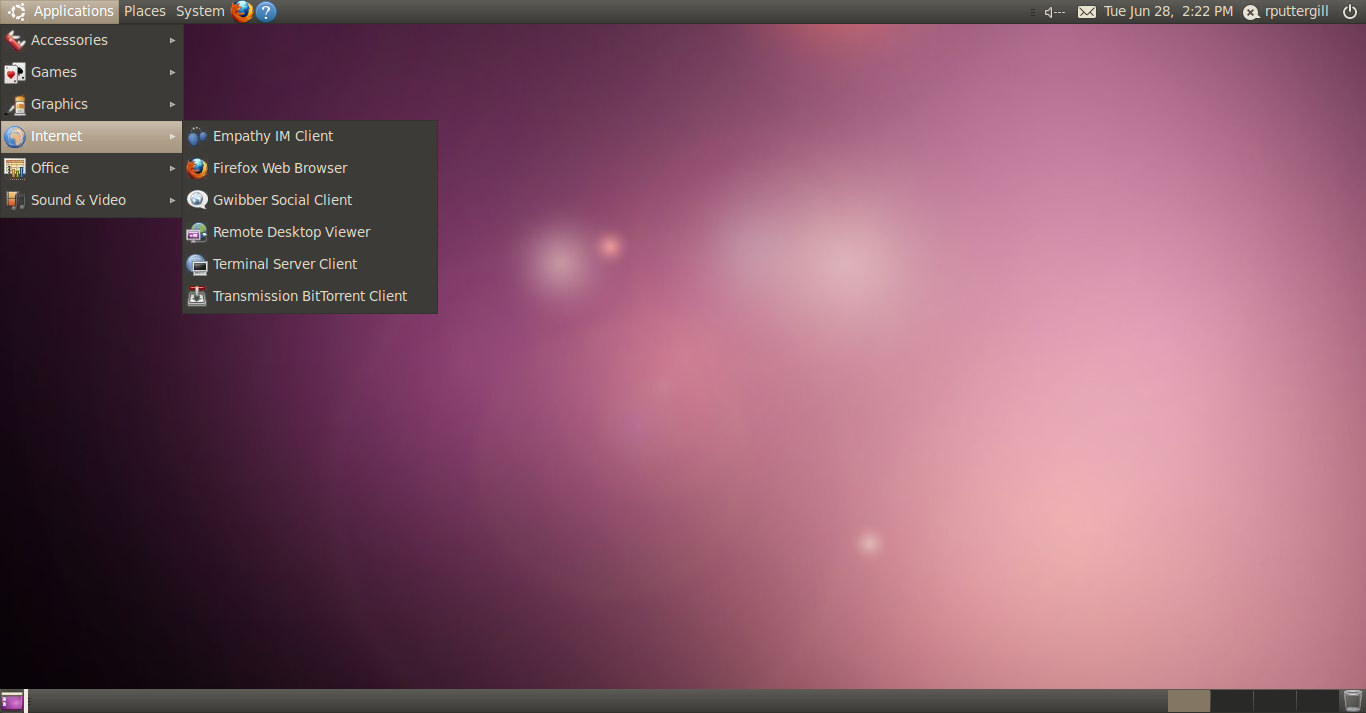
Installing the QVD Client on an Ubuntu Linux platform is simple. You should add
the QVD repository to your apt repository sources if you haven't already done
so.

Firstly, add the QVD packages public key to your trusted keys (as root):

[subs="attributes"]
----
# wget -qO - https://www.theqvd.com/packages/key/public.key | sudo apt-key add -
----

Now, add the repository:

[subs="attributes"]
----
# echo "deb http://theqvd.com/packages/ubuntu-trusty QVD-3.5.0 main" > \
/etc/apt/sources.list.d/qvd-35.list
# apt-get update
----


You will now be able to install the client with the following command:

----
# apt-get install perl-qvd-client
----

Installing the QVD Client under SLES is very similar.

Firstly, add the QVD packages public key to your trusted keys (as root):

[subs="attributes"]
----
# wget -qO - https://www.theqvd.com/packages/key/public.key | sudo apt-key add -
----

Now, add the repository:

[subs="attributes"]
----
# echo "deb http://theqvd.com/packages/ubuntu-trusty QVD-3.5.0 main" > \
/etc/apt/sources.list.d/qvd-35.list
# apt-get update
----


Now install the QVD Client:

----
# zypper install perl-QVD-Client
----

Depending on your Desktop Environment, you should be able to access the client
within your 'Applications' menu, usually under the 'Internet' submenu.
Alternatively, you can run the client GUI from the console using the command
`/usr/lib/qvd/bin/qvd-gui-client.pl`.

Connecting to your Virtual Desktop
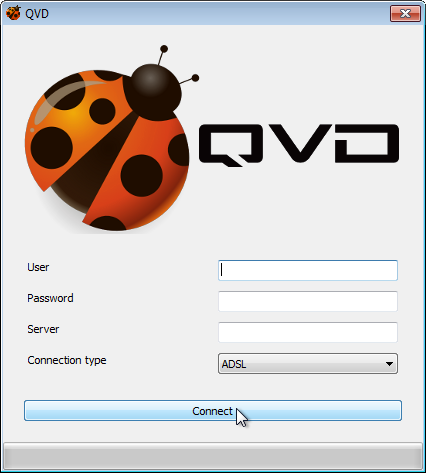
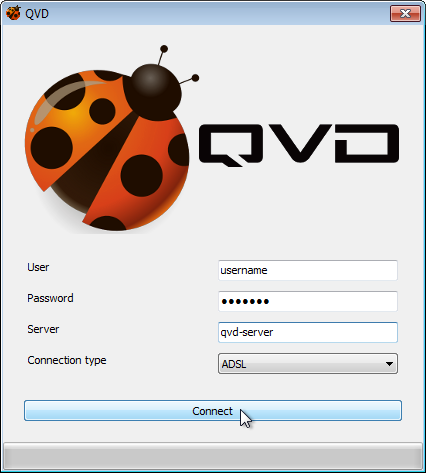
Once you have the GUI client running, you can enter the Username for the user that you created in QVD, the Password that you configured for the user, the Server hostname or IP address for the QVD Server Node that you created, and you can choose the level of compression for the connection by selecting a Connection type.
By default, the Connection type is set to Local. This setting is appropriate for connections over a local area network. There are also options for ADSL, which would be appropriate for any broadband connection, and for Modem which can be used in cases where bandwidth is severely limited or impaired.
Changing the Connection type will increase the compression used to deliver the virtual desktop across your network connection. It also increases the amount of caching that the client performs to limit the amount of screen refreshing that needs to take place.
In general, using heavy compression and caching will still afford your users the ability to work comfortably within their virtual desktops. However the quality of graphical rendering will be slightly inferior.
Once you have completed entering your connection details, simply click on the button labelled Connect and your virtual desktop should load.
8. Additional Notes about Server Side Administration
At this point, you should have a functional installation of all of the QVD Server Side components. If you connect to the server with a client, you will be able to access your virtual desktop. Nonetheless, you may still have some other questions. This section is here to help provide you with some answers and some pointers toward documentation that may help you to resolve any additional requirements.
8.1. Creating Your Own Image
In this guide, we took advantage of a pre-built image and simply loaded it into QVD. At this point, you are more than likely asking yourself whether you can create your own images. The answer is a resounding Yes!. We provided an image so that you could get started very quickly to evaluate our product.
The steps to create your own image are relatively easy to follow and are documented fully in the QVD Administration Manual in the chapter titled DI Creation.
An OSF needs to run the QVD Virtual Machine Agent (QVD-VMA). Currently, QVD has packages for Ubuntu and SUSE Linux. However, the QVD-VMA is simply a perl script that can run on any Operating System that supports Perl and that can run an NX Server. This means that you can create an OSF for any Linux distribution or for Solaris.
8.2. Making Changes To An Image
If you’re happy with the current image, or you have already created your own, you may want to know how you can edit this image to include different applications, or to change behaviors within the image. If you have already tried to do anything like this connected to your virtual desktop using the client application you will have realized that changes within the base operating system image are not persistent. That is, when you restart the image, any changes are lost.
This is actually one of QVD’s strengths. It helps to protect all of your users from damaging changes and ensures that if any desktop is compromised the damage only lasts for as long as the desktop is running.
However, it is possible to change an image and to install new applications. In order to do this, you effectively run the image in a different mode. This will allow you to make changes to the underlying image file, so that when it is reloaded all users who access the same image will see the changes.
The ability to switch modes so that you can edit your OSF is available within the QVD-WAT. The process for editing an image is fully documented in the QVD Administration Manual in the chapter titled Editing a DI.
8.3. Configuring periodic tasks
In some rare cases, the HKD running on the QVD Nodes could terminate leaving some orphan virtual machine process behind (this could happen for instance, if some administrator kills the daemon processes).
In order to stop any orphaned virtual machines as soon as possible (otherwise, they could be started in other node simultaneously, thus corrupting the disk images), the qvd-vm-killer program has to run every minute.
Install the perl-qvd-vmkiller package so the following entry is automatically added to the crontab:
* * * * * /usr/lib/qvd/bin/qvd-vm-killer.pl
8.4. Authenticating Users Against LDAP
You may already have your own authentication infrastructure in place, particularly if your organization makes heavy use of Microsoft Windows and Active Directory, or if you use some other LDAP service to manage your users. In this guide, users were created within the QVD-WAT and added into the PostgreSQL database. However, it is relatively trivial to point QVD at an LDAP resource to handle the authentication of users.
This is controlled by configuration keys in the QVD database that can be changed using the CLI Administration Tool.
For example, to set up authentication against an LDAP server that runs on the machine aguila on the port 389 with search base dc=example,dc=com you would execute the following command:
# qa config set l7r.auth.mode=ldap auth.ldap.host=aguila:389 auth.ldap.base=dc=example,dc=com
When a client attempts to authenticate, the QVD Server Node will connect to the LDAP Host and perform a search for the user with the uid attribute matching the provided username. The LDAP search is performed with a default scope of base. Once a match is found, a typical BIND request is performed for the user and if successful, the user is authenticated.
It is possible to change the default values for the scope and filter used in the LDAP search, to match your environment. For instance, you might do the following using the CLI Administration Tool:
# qa config set auth.ldap.filter='(cn=%u)' auth.ldap.scope=sub
|
|
Use quotes around any special characters that may be subject to shell expansion or otherwise interpreted in a way that you have not intended such as pipes, brackets, ampersands and so on. |
Currently, you still need to add all of your users within the WAT, since you will need to assign the users each to a virtual machine. However, this facility will simply ensure that users are authenticated against your LDAP repository.
It is possible to automate the provisioning of users and virtual machines from LDAP to QVD and there are tools available to do this, but they are not released with the Open Source Edition of the software. Further details are available within the QVD Administration Manual
8.5. Managing A Virtual Machine As An Administrator
If a Virtual Machine doesn’t start properly or you need to access it directly as an Administrator, QVD provides a virtual console, SSH access and can even offer VNC access to a virtual machine (VNC option is only available for KVM images).
For situations where a virtual machine doesn’t start, it will more than likely be shut down and will enter a blocked state so that clients are unable to connect to it. An Administrator is able to unblock a virtual machine and restart it. Using telnet, the Administrator can then view the boot process as if at a serial console. If the machine manages to get past the boot phase and networking is loaded correctly, the Administrator can use SSH to access a terminal within the virtual machine.
These topics are fairly advanced and are covered in much more detail within our QVD Administration Manual
8.6. LXC Virtualization inside QVD
This Installation Guide is mainly focused on demonstrating how easily you can provide Virtual Desktops to end users by using the KVM hypervisor within the QVD infrastructure. For environments where the base operating system used for the desktop platform will essentially be the same as the host operating system, you may be able to benefit from improved performance and resource management by taking advantage of LXC technology in conjunction with QVD.
As of QVD 3.1, the KVM hypervisor can be disabled and virtualization can be achieved using Linux Containers (LXC). This is an exciting new OS-level virtualization technology that allows for a greater number of guest VMs by running on the same kernel as the host system, increasing efficiency. LXC setup is slightly more involved and is beyond the scope of this guide, please refer to the chapter on Using LXC Virtualization in QVD in our QVD Administration Manual for further information.
9. Conclusion
In this guide, we have stepped through a basic installation and configuration of all of the components within a QVD solution. Hopefully, by following the guide you have managed to get your own virtual desktop solution running and have been able to connect to it using a QVD client.
QVD can be used for a wide range of purposes and scales incredibly well, making it the first choice for a desktop virtualization platform within the enterprise. Its remote management facilities, its ease of integration with other technologies and its ability to service remote users in a safe and secure manner will help you to improve the management of your Linux and Solaris users and to reduce the costs associated with desktop virtualization.
We hope that this demonstration has helped you to get started with QVD and that you will continue to explore its capabilities in the future.
If you have any queries or require additional support, please visit our website at http://theqvd.com/ or contact us at info@theqvd.com.