This document was last updated: 2012-12-11
Its current revision number is set at: 17480
2. Introduction
The QVD provides demo desktop images for use with the product, but sooner or later the serious user will need to consider building their own desktops, tailored to the needs of their particular users. This guide aims to explain that process in its simplest form, and to give the administrator the basic building blocks for their own desktop images.
The process itself is fairly straightforward and entails the following steps to create KVM and LXC images:
-
Installing a clean build system in KVM
-
Installing inside that build system LXC userspace utils and creating a container (LXC only)
-
Configuring either the build system or the LXC container to run the QVD Virtual Machine Agent which manages the connections between the QVD client and the desktop
-
Customizing and branding the desktop to the needs of the user
-
Shutting down and zipping up the container or the KVM install itself
-
Deploying the zipped image to QVD using either the Web Administration Tool or the qvd admin command line tool
3. Building the Image
3.1. Install a Build System
To create a disk image for either KVM or LXC, you will need to install a base image to work from. This base image will form the basis of the KVM image if that is what you are creating, for LXC it will provide a system from which to build and zip an LXC image.
To create the images, we will use openSUSE 12.3. Although SUSE Linux Enterprise Server is supported as the QVD server, openSUSE provides a more flexible desktop experience and is available without licensing costs. We will the the 32 bit version of the distribution as our desktop for the simple reason that each desktop will have a smaller memory footprint.
Download an openSUSE iso from http://software.opensuse.org/123 and make sure to note down the MD5 checksum as you go through the download process and check it against your download. We have used the Network Install for this manual, the full version will also work.
Ensure that you have the SUSE KVM pattern installed:
$ sudo zypper install --type pattern kvm_server
Now, create a qcow2 disk image file, setting the maximum file size at 4.5GB for kvm and roughly double that for LXC as you will need the additional room for installing software inside your container. Note that initially the file will be a fraction of this size as it will grow dynamically to accomodate needs. Indeed the final result should be considerably smaller and even less when compressed.
$ qemu-img create -f qcow2 qvd.img 4.5G
If you are not building as root and there is no need to be, add the user account you are using to the kvm group (as root):
# usermod -A kvm <user>
You will need to log that user out and back in for the group permissions to be acknowledged by the system.
Now start the image with the SUSE iso as your cdrom device to get the install underway and with a mere 512MB RAM:
$ qemu-kvm -hda qvd.img -cdrom SLES-11-SP2-DVD-x86_64-GM-DVD1.iso -m 512
Obviously if your iso is in a different folder to this image, you will need to change your path accordingly. Select Installation from the list of options and wait for the system to boot up and load the YaST installation program.
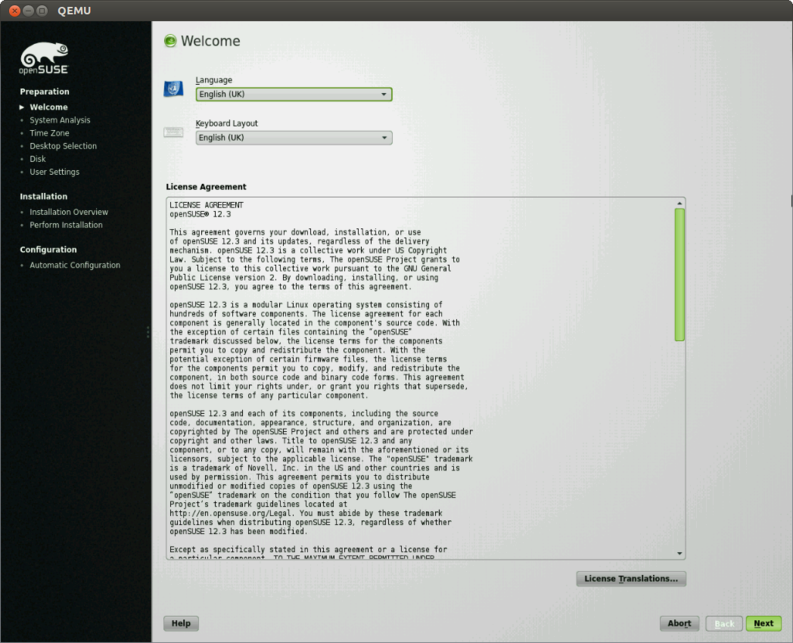
Select your language, agree to the license, and click Next until you reach the option to perform a new install.
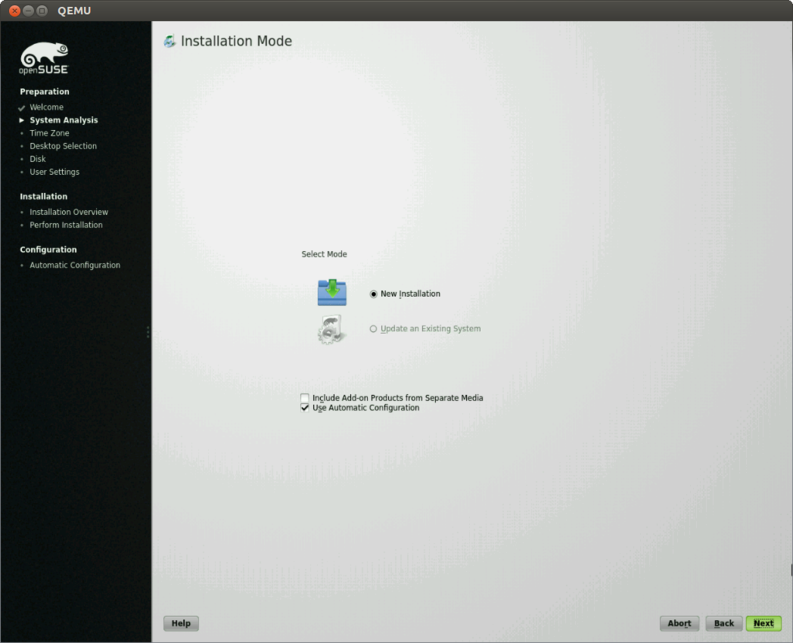
Most of the install is pretty self explanatory, so we won’t cover it in too much depth. Select New Installation, and work through the steps, selecting LXDE as your preferred desktop.
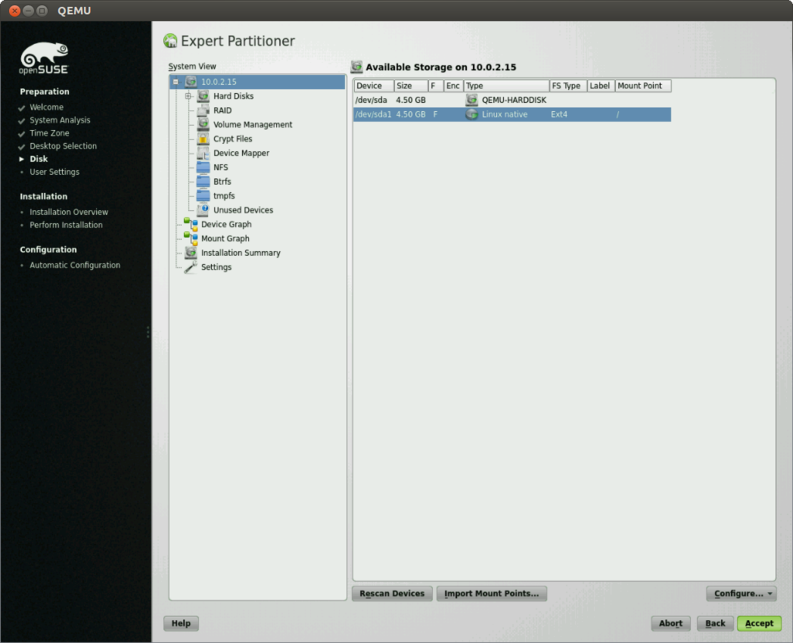
As a rule we don’t want or need a swap partition within disk images in QVD, so when you get to the Installation Settings screen, select the Partitioning link and choose Custom Partitioning. In the partitioning screen, delete all suggested partitions and add a new one. Use the maximum space and format the partition using ext4 and make sure to have the partition mount point as /. Accept that setup (and the warning about not having a swap partition).
When you are prompted to add a new user, do so. This user will be your administrative user for KVM and indeed inside the VDI as well as being the account you use to create LXC images if that is your aim.
Before you continue with the install, you may wish to go into the software section and customize your image by installing software or, indeed, stripping out software to make the footprint lighter. This can also be accomplished at a later stage, but if you wish to keep the image size manageable it is probably best to do this now.
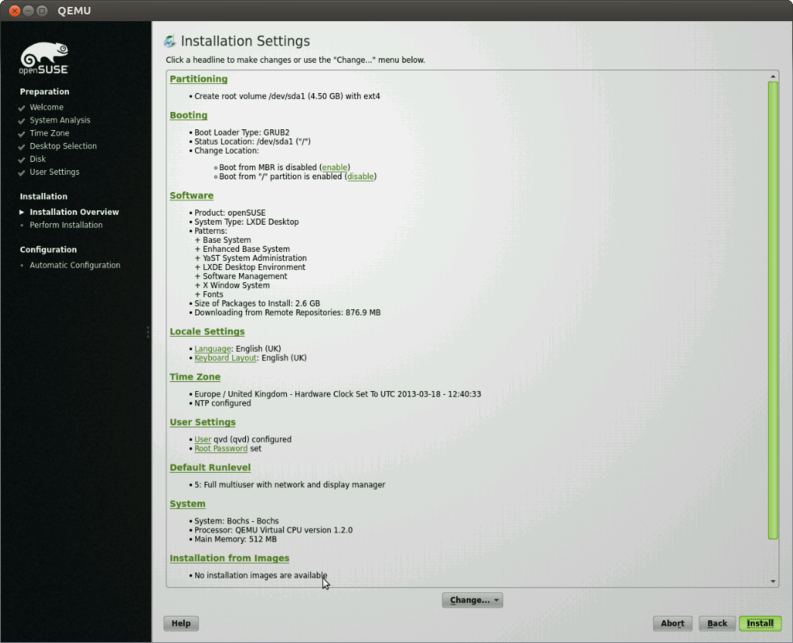
Once you are happy with the configuration, select the Install button and let YaST continue with the installation.
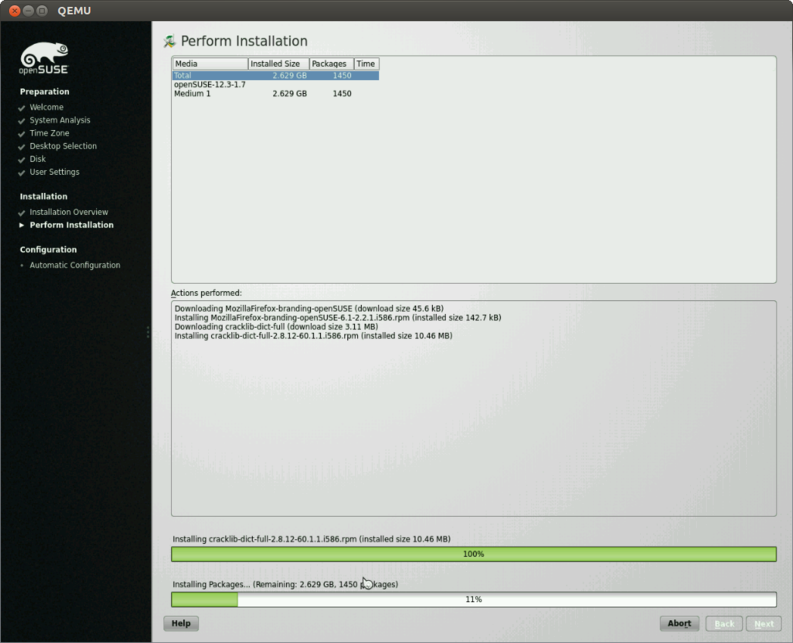
Once everything is installed, boot into the new OS. and log in using the user credentials that you set during the install. At this point, the install process diverges depending on whether you want to create a KVM image, or an LXC one. If the former, continue on to the next section, for the latter, skip to the Create an LXC Disk Image section.
3.2. Create a KVM Disk Image
As stated previously, the KVM install we are working in is going to be the basis of the image that you create. That is to say, everything that is installed and customized inside this VM will be a part of the desktop environment you create for your users. The user you have created will not be a desktop user, rather the administrative user that you can use to maintain and install software on the image to make available for your users.
3.2.1. Install the QVD Virtual Machine Agent
The QVD Virtual Machine Agent (VMA) is responsible for accepting connections from the client via a QVD Server Node. It facilitates access to the desktop environment running within the virtual machine, including the ability to configure printer access and to configure the virtual machine to stream audio to the client.
Firstly, get the VM up to date with the latest updates and patches from the openSUSE repos:
# zypper ref && zypper dup -l
Firstly, add the QVD packages public key to your trusted keys (as root):
# rpm --import https://www.theqvd.com/packages/key/public.key
Now, add the repository:
# zypper ar http://theqvd.com/packages/sles/11SP2/stable QVD
# zypper ref
Finally, install the VMA:
# zypper in perl-QVD-VMA
It is essential that the Virtual Machine Agent starts on boot or the desktop will not be accessible:
# chkconfig qvd-vma on
The VMA is controlled through the file /etc/qvd/vma.conf. This file is not created on install, so let’s create the directory, and copy the sample VMA configuration file into place.
# mkdir /etc/qvd
# cp -v /usr/lib/qvd/config/sample-vma.conf /etc/qvd/vma.conf
If you take a look at the vma.conf file it has a couple of sensible presets:
vma.audio.enable = 1
vma.printing.enable = 1
To that you will need to add one line, the command to start the LXDE session:
command.x-session: /usr/bin/startlxde
Other settings are detailed in the QVD Administration Manual.
Assuming you want audio and printing, leave those as they are and start the VMA:
# /etc/init.d/qvd-vma start
Ensure that the VMA is up and running:
# /etc/init.d/qvd-vma status
Checking status of QVD VMA qvd-vma
running
3.2.2. Install and Configure Secure Shell and Serial Access
To administer the image once it’s been installed, ensure that the openssh server is installed and enabled at boot:
# zypper in openssh
# chkconfig sshd on
When the image has been deployed in QVD, this can be accessed using the QVD admin tool for administration / troubleshooting:
$ qa vm ssh -f id=<vm_id> -- -l <user>
To enable serial access to your VM, that too is readily set up. Within the DI, edit the file _/etc/inittab_ and add the following line:
S0:2345:respawn:/sbin/agetty --noclear -L 115200 ttyS0 xterm
Once the Serial Port has been configured, the default settings for any Server Node will allow you to access a running Virtual Machine using telnet or the QVD CLI Administration Utility with a command like:
$ qa vm console -f id=<vm_id>
3.2.3. Customize and Brand the Desktop
From here, it’s up to you. Install system updates and the packages that you would like available for your users. This may involve the packages available for your distro, it may be the custom software that your company uses. Ready the desktop for use as you would like your users to experience it, and once you are happy with your disk image, power it down and it’s ready for use with QVD.
3.2.4. Tar and Zip the Image
QVD accepts compressed tar archives and the image should compress substantially to make is quicker to transfer to other hosts, so you should tar and zip the KVM image as follows:
$ tar czf qvd.img.tar.gz qvd.img
And unzip it on the destination server when you are ready to move it to staging:
$ cd /var/lib/qvd/staging && sudo tar zxf /path/to/qvd.img.tar.gz
Once you’ve moved the image into staging, it will be available in the QVD Web Administration Tool. You can create a new set of runtime settings for the image (OSF) and add the disk image to the database. Finally, you will need to create a new Virtual Machine for each user that will use this disk image and it’s ready to be used. And that concludes our little introduction to creating KVM images for use with QVD. It’s pretty simple really, and the beauty of the KVM image is that any time you want to tweak an image, you can open it up in kvm and administer it as though it were a real desktop, shut down, copy the image to staging and deploy.
3.3. Create an LXC Disk Image
LXC is a fairly recent but rapidly stabilising technology that allows for running multiple isolated Linux systems (containers) on a single host. Because these containers utilise the same kernel as the host, it’s an extremely efficient method of virtualisation that allows for a greater VM density than KVM.
Due to the patching that each Linux distribution does to their release kernels, it is advised to use the same or similar distro for your clients. Here we will create an openSUSE 12.1 client for use on SLES 11 SP2. SUSE Linux Enterprise Desktop is perhaps a closer fit but will incur licensing costs.
As stated earlier, the KVM system you have just installed will not itself be the basis for the QVD image, but will be used to install LXC and create a suitable environment for your desktop users within the KVM image itself.
3.3.1. Add a Network Bridge
To provide the LXC container with network access, we will need to create a network bridge. This bridge will allow the container to communicate through the host VM’s primary interface, presumed to be eth0. The bridge can be added via YaST or simply by repeating the following commands in a shell as root:
# BRIDGE=lxcbr0
# IFACE=$(/sbin/ip route list | awk '/^default / { print $5 }')
# GATEWAY=$(/sbin/ip route list | awk '/^default / { print $3 }')
# ADDRESS=$(ip addr show $IFACE | awk '/inet / { print $2 }')
# brctl addbr $BRIDGE
# brctl addif $BRIDGE $IFACE
# ifconfig $IFACE 0.0.0.0 up
# ifconfig $BRIDGE $ADDRESS up
# ip route add default via $GATEWAY dev $BRIDGE
3.3.2. Install the LXC User Space Tools
Once logged into your kvm build environment, su to root, and install the LXC user space tools:
# zypper install lxc
3.3.3. Create a Basic LXC Configuration
That done, create a file called lxc.conf somewhere convenient, and populate it with the following network settings:
lxc.network.type=veth
lxc.network.link=lxcbr0
lxc.network.flags=up
The first line will tell lxc that we wish to use a virtual ethernet device inside the container. The second line gives lxc the name of the network bridge that we want the container to utilise to connect to the network. Finally, we set the network as up.
3.3.4. Create and Run the LXC Container
Now let’s create a new Linux container:
# lxc-create -n qvd-vm -t opensuse -f lxc.conf
The first time you do this it will take a little extra time compared to subsequent builds as it will pull down the core packages from the SUSE servers to install inside the container. The next time you create a container using the same template (in this case opensuse), these packages will be reused so it will be quite a bit quicker. Once this is done, start the container:
# lxc-start -n qvd-vm
This will both start the contained and put you straight into the login prompt. Log in using root as both username and password.
|
|
Ensure you change the root password once you are logged into the VM for the first time. |
3.3.5. Install the QVD Virtual Machine Agent
The QVD Virtual Machine Agent (VMA) is responsible for accepting connections from the client via a QVD Server Node. It facilitates access to the desktop environment running within the virtual machine, including the ability to configure printer access and to configure the virtual machine to stream audio to the client.
Firstly, get the VM up to date with the latest updates and patches from the openSUSE repos:
# zypper ref && zypper dup -l
Firstly, add the QVD packages public key to your trusted keys (as root):
# rpm --import https://www.theqvd.com/packages/key/public.key
Now, add the repository:
# zypper ar http://theqvd.com/packages/sles/11SP2/stable QVD
# zypper ref
Finally, install the VMA:
# zypper in perl-QVD-VMA
It is essential that the Virtual Machine Agent starts on boot or the desktop will not be accessible:
# chkconfig qvd-vma on
The VMA is controlled through the file /etc/qvd/vma.conf. This file is not created on install, so let’s create the directory, and copy the sample VMA configuration file into place.
# mkdir /etc/qvd
# cp -v /usr/lib/qvd/config/sample-vma.conf /etc/qvd/vma.conf
If you take a look at the vma.conf file it has a couple of sensible presets:
vma.audio.enable = 1
vma.printing.enable = 1
To that you will need to add one line, the command to start the LXDE session:
command.x-session: /usr/bin/startlxde
Other settings are detailed in the QVD Administration Manual.
Assuming you want audio and printing, leave those as they are and start the VMA:
# /etc/init.d/qvd-vma start
Ensure that the VMA is up and running:
# /etc/init.d/qvd-vma status
Checking status of QVD VMA qvd-vma
running
3.3.6. Install and Configure Secure Shell and Serial Access
To administer the image once it’s been installed, ensure that the openssh server is installed and enabled at boot:
# zypper in openssh
# chkconfig sshd on
When the image has been deployed in QVD, this can be accessed using the QVD admin tool for administration / troubleshooting:
$ qa vm ssh -f id=<vm_id> -- -l <user>
To enable serial access to your VM, that too is readily set up. Within the DI, edit the file _/etc/inittab_ and add the following line:
S0:2345:respawn:/sbin/agetty --noclear -L 115200 ttyS0 xterm
Once the Serial Port has been configured, the default settings for any Server Node will allow you to access a running Virtual Machine using telnet or the QVD CLI Administration Utility with a command like:
$ qa vm console -f id=<vm_id>
3.3.7. Customize and Brand the Desktop
Although LXC has copied the rudimentary system over to the container, the template does not allow for a desktop environment, so you will need to install that.
# zypper in patterns-openSUSE-lxde
This would also be a good time to install any additional desktop software that your users might need, so go ahead and install any office software, graphics software and so on using apt as above.
Before we log out, create a new administrative user for the disk image, and delete the default user and home directory:
# adduser qvd
# usermod -aG sudo qvd
|
|
At this point we could delete the user with the --remove-home switch but this requires the perl-modules package which brings, along with dependencies, another 32MB to the install. It’s up to to the use case and space constraints of course. |
Branding and customization of the desktop environment is beyond the scope of this guide, but there is a list of resources at the end to assist with this. Once you have desktop that you want for your users, you can close down the container in preparation for zipping up the image.
# telinit 0
3.3.8. Tar and Zip the Image
Back in your host machine tar and zip (as root) the root file system of the container for deployment in QVD:
# tar czf ubuntu-12-04.tar.gz -C /var/lib/lxc/qvd-vm/rootfs .
4. Deploying the Image
By now you should have your gzipped and tarred image, either KVM or LXC. Upload it to your node server if you have built it on another machine, and then copy the file over to the directory /var/lib/qvd/storage/staging which it will be available as an image file in the QVD Web Administration Tool, ready for deployment as a Disk Image.

Once you have created a new disk image in QVD, using your uploaded disk image and an Operating System Flavor which consists of a few runtime settings such as the amount of RAM you wish to allocate and the allotted disk space, go into the Users tab in the WAT and add machines to your users. Rollout to multiple users can also be achieved using hooks within the QVD but that is beyond the scope of this guide.
And that concludes our creation of an Ubuntu disk image for QVD. As you can see, it’s a really quick and easy process and allows for almost endless customization of the desktop you wish to provide your end user. Another of the many benefits of choosing the QVD as your VDI solution.
5. Appendix A: Appendix
5.1. Resources
To make your customization and branding global, rather than use the home directory for your user account (which is really just your administrative account for the image), changes need to be made in the /etc/skel directory, which acts as a template for new users' home directories when new users are added. QVD conforms to this practice, so each new Virtual Machine will create a home directory based on this folder in the Disk Image. For the PCManFM use /etc/skel/.config/pcmanfm/lubuntu/pcmanfm.conf and for LXPanel use /etc/skel/.config/lxpanel/Lubuntu/panels/panel.
5.2. Logging Remotely
Logging remotely to a daemon supporting the syslog protocol can be desirable for a couple of reasons. Firstly, it keeps the logs for all the virtual machines that have been configured thus in one place which makes accessing the logs easier and more logical. Secondly, in a situation where the administrator may not be able to access a virtual machine’s log for some reason, for example if it is not starting up, logging remotely might help in identifying the problem.
To set up remote logging, you will need a configured remote logging server, and to make some changes within your disk image, both to QVD’s vma.conf file, and to the syslog settings to send any syslog messages on to the remote logging server.
To demonstrate we will use Rsyslog which has become the default logging utility for many of the major Linux distributions over recent years, including Ubuntu, SUSE, and Redhat, and is reliable and easy to set up. Because QVD uses Log4perl, it should be syslog server agnostic, so you should be able to use these instructions with syslog-ng amongst other alternatives if needs be.
Should rsyslog not be installed inside your VM, install it as follows:
# zypper in rsyslog rsyslog-module-relp
That done, we will need to configure rsyslog to accept remote connections. In this example, we will use the Reliable Event Logging Protocol (RELP) as we have found it to be just that, but you may of course use TCP or UDP as you see fit. To set up rsyslog to use RELP, create the file 30-remote.conf in the folder /etc/rsyslog.d/, and enter the following configuration:
$ModLoad imrelp
$InputRELPServerRun 2514

$template remotefile,"/var/log/%HOSTNAME%-%syslogfacility-text%.log"
*.* ?remotefile
This loads the RELP input module, and sets the server to listen on port 2514. Next, it tell rsyslog to generate the log filename dynamically, depending on the hostname of the client. The following line tells rsyslog to log all messages to this dynamically formed file. Now, restart rsyslog:
# service rsyslog restart
Next you will need to configure the QVD image to log remotely to this server. Inside the QVD image that you will be using, create in the folder /etc/rsyslog.d/ a file called 00-remote.conf and enter the following configuration:
$ModLoad omrelp
*.* :omrelp:<hostname or IP address>:2514
Make sure to enter the IP address or hostname of the logging server. This configuration will tell rsyslog on the virtual machine to load the RELP output module, and to use port 2514 on your rsyslog server. Furthermore, it will log all output (.) to this remote host.
|
|
Ensure that the RELP module is available on the server, and if not install it (the package is rsyslog-relp on Ubuntu and rsyslog-module-relp on SUSE). |
Finally, edit the file /etc/qvd/vma.conf on the virtual machine and enter the following to instruct QVD to log to syslog:
log4perl.appender.SYSLOG = Log::Dispatch::Syslog
log4perl.appender.SYSLOG.layout = Log::Log4perl::Layout::PatternLayout
log4perl.appender.SYSLOG.layout.ConversionPattern = %d %P %F %L %c - %m%n
log4perl.rootLogger = DEBUG, SYSLOG
log.level = DEBUG
Of course, having set syslog itself to log remotely, this log data will get passed by rsyslog to the remote server you have set up. To test this, simply use the logger command inside your image and the output should be in the logging server’s logs.
5.3. Software
5.3.1. Installing additional software
Any additional software installed inside your KVM image or within your LXC container prior to zipping and deployment will be available to your desktop users. For most software this can be done using your package manager
To install LXDE after the initial install, simply select the pattern provided by SUSE:
# zypper in -t pattern LXDE
To install the office pattern, including libreoffice, use:
# zypper in -t pattern office
To get a list of available patterns, run the following command:
# zypper se -t pattern
To learn more about any particular command, pass the info command to zypper:
# zypper info -t pattern office
Other software is install in a similar fashion:
# zypper in gimp MozillaThunderbird icedtea-web
5.3.2. Application Optimization
Certain applications optimized for a remote connection. For example, preventing the caret from blinking in Firefox will deliver a smoother experience:
# echo 'pref("ui.caretBlinkTime", 0);' >> /etc/firefox/syspref.js
5.3.3. Remove Unneeded Services and Disable udev
It is advisable to remove any unneeded services that may impact on performance within your disk image. Under LXC, disabling udev has been shown to increase performance, particularly with regards to larger installs.
To remove avahi:
# zypper rm avahi
If you do not wish to log your containers as per the instructions above, you might as well remove syslog:
# zypper rm rsyslogd
Remove uneeded programs to keep your disk image smaller:
# zypper rm xscreensaver
Clean both repository metadata and package caches:
# zypper clean -a
Disable udev as follows:
# chkconfig boot.udev off
Furthermore, prevent any network conflicts by emptying the /etc/udev/rules.d/70-persistent-net.rules file in your container which can delay boot times and prevent the network from functioning:
$ echo "" > /etc/udev/rules.d/70-persistent-net.rules